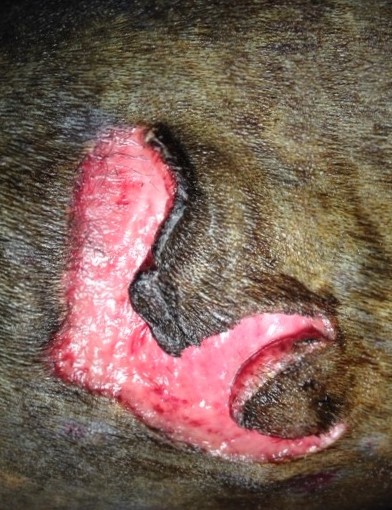
One of the most common surgeries performed in veterinary medicine is wound repair. Bites, punctures, foreign bodies and lacerations often cause severe wounds and require extensive treatment. Young animals seem to be more prone to these accidents than adults. Pictured below is the side of a young dog. She was playing with her litter mate when she ran into trouble in the form of a pole.
The first step in repair is cleaning the wound and surrounding tissues. Sterile lube was placed in the wound to keep hair from sticking then the entire area was shaved down to the dermis. The skin was scrubbed with an antiseptic solution then the entire area was rinsed with copious amounts of fluid.
After draping, the wound was debrided with a scalpel blade to remove any hair and debris still embedded in the wound. (See the upper left side of the laceration.) The unhealthy edges of the skin were also removed. This is done by cutting down to tissue that bleeds well.
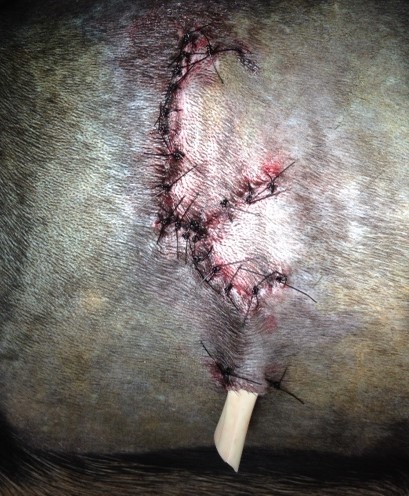
With the wound clean, it was time to start the repair. As you can see from the photo, the wound has two flaps, the big one on top and a smaller one on the bottom. When these are sewn into place, there will be pockets created underneath. These pockets can fill with fluid or become infected. To prevent this, a drain is placed under the skin. The top end is sutured under the skin at the top of the incision. The bottom is exited through a stab incision in the skin just below the laceration and sutured in place.
Now, it was finally time to close the wound. The flaps were stretched into the proper position and tacked with a simple stitch to keep the flap in position and relieve tension on the incision. Next, a continuous line of suture was placed under the skin in the subcutaneous tissue. This holds the entire wound together. Since this line of suture is critical to a successful repair, extra ties or throws are put into the knot and a thicker suture is used. Skin stitches are the final layer in closing a wound. Each stitch is tied individually and then cut to leave 1/2 inch ends. It is the black suture seen in the picture below.
I am happy to report that this puppy is healing well. I removed her drain four days post-op. She will come back in another week for removal of the dermal sutures. The subcutaneous suture does not need to be removed. It will dissolve by itself.
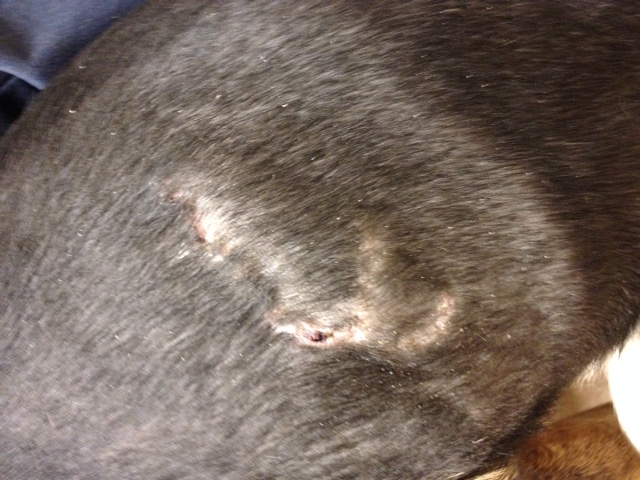
Update: Here’s a picture of the wound after the sutures were removed. I am pleased with how well this puppy healed!


